
These cookies are pretty easy to make and they require no cookie cutters or decorating afterwards. I know that's part of the fun but my kids get bored half way through and I'm left rolling out and cutting the rest of the cookies. So this worked out great.


I found mixing small handfuls at a time the easiest way to get the colour all mixed in. The girls had fun mixing - it was like playdough but they could eat some as they played with it.

This is why I suggest mixing with a spoon first. You'd think I would have learned after the first colour but as you see I have at least 3 colours on my hand.

Now you have 4 pretty balls of dough.

On a piece of wax paper we made ropes of dough and layered them together.
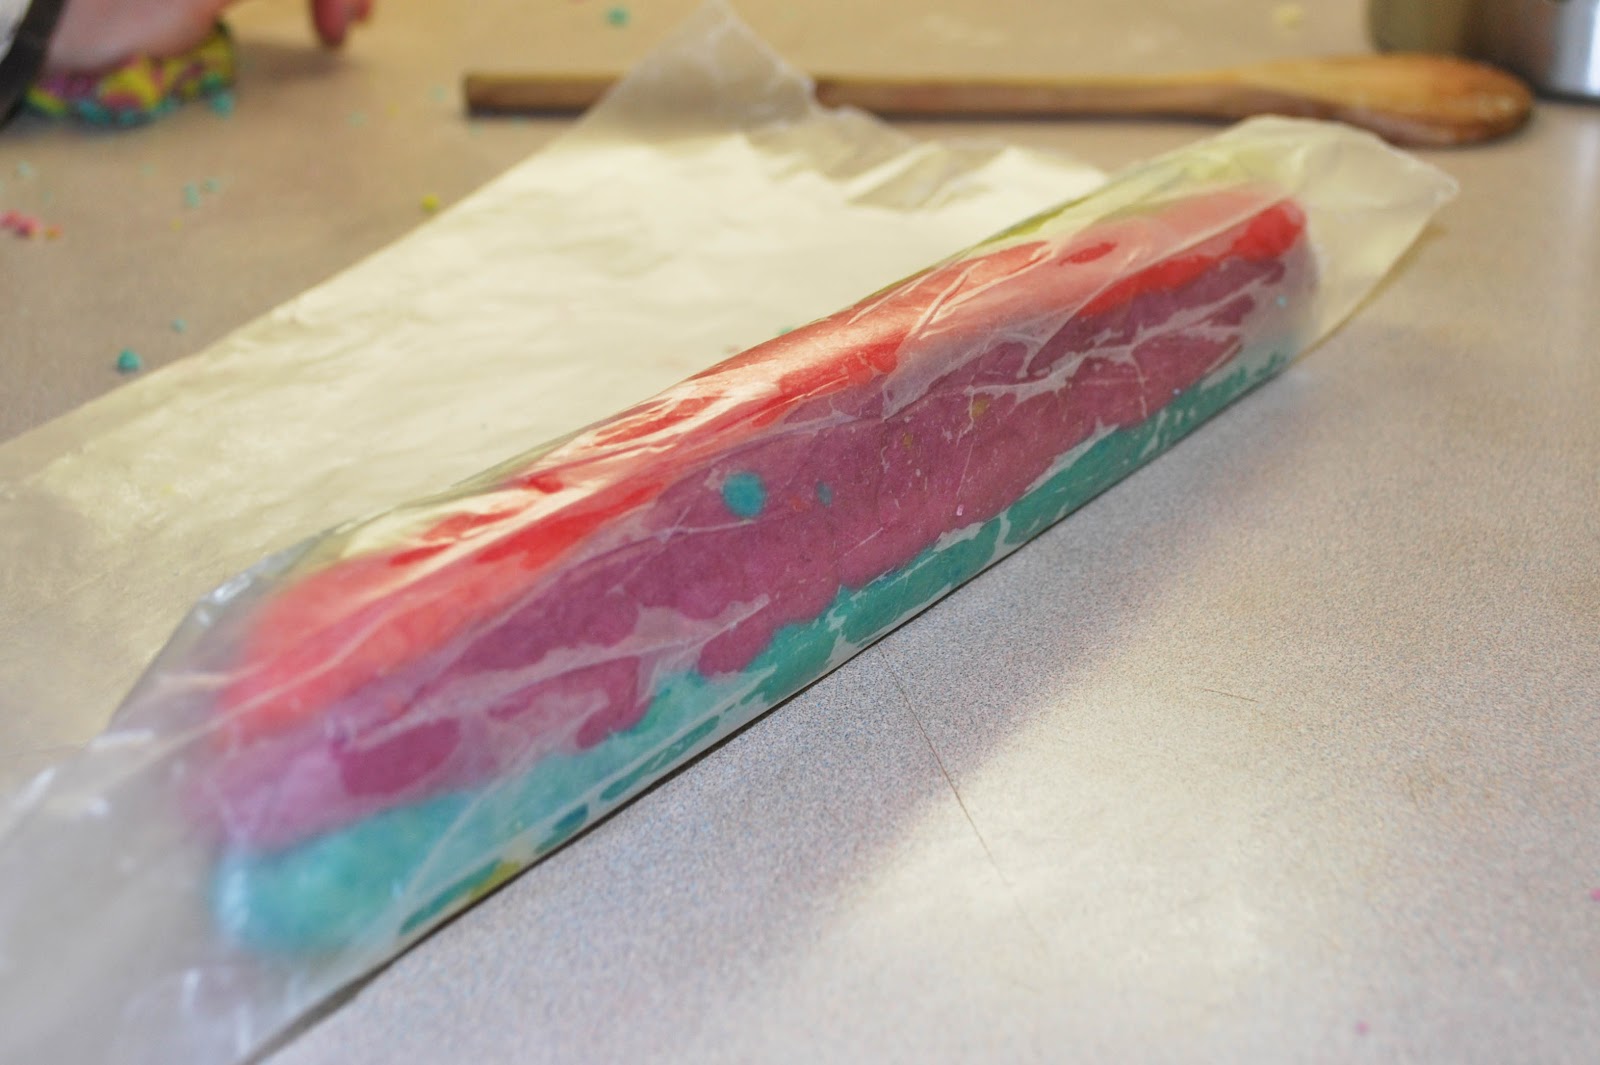
Then roll them up, pressing all the colours together. Try to form the roll so it's a egg shaped - so narrower at the top. Put in the freezer so 15 mins.

Take out of the freezer and cut into 1/4" slices.
Then put on a cookie sheet - you might want to re-shape them so they are more egg shaped before baking.
And here you go, beautiful Easter Egg cookies.

We also made a few roll out cookies with some of the extra dough and made some tie dyed looking flowers and bunny.


1 comment:
These are unique! I'm making an artists pallet cookie with Little M&Ms for the dobs of paint. I'll try your idea to make the pallets. I think it will look like the artistt's blended paints on her pallet. Thanks for a great idea!
Post a Comment