Showing posts with label Dad gifts. Show all posts

Sunday, June 03, 2012

How to make a Pretzel mix for Dad


Hubby's birthday was the other week and I was thinking of crafts for the kids to make. I wanted something that he would really enjoy and was different then past presents. He loves snack mixes and thought it would be fun for the kids to pick out all the ingredients. 


So I took a trip to the Bulk Barn with the kids and we picked out a yummy collection for our mix: waffle pretzels, pretzel nuggets, sesame sticks, salted peanuts, salted almonds, cashews, chocolate rosebuds and M&Ms. 
When we got home we put all the ingredients into a big bowl and mixed it all up. Then scooped it into a large jar that I got from the dollar store. We had some extra so we poison tested it (you know we couldn't give it to Dad if it didn't taste good, right?).
Lilo then helped me decorate the jar with curling ribbon. She was proud of herself for learning to curl the ribbon. 
I forgot to take a picture before we gave it to him which is why it's not full. He loved it and it was gone pretty fast, I think it was a win.


He also got a painted shirt from Isla. It was a freezer paper stencil like Lilo made for him last year for his birthday. I really liked how it turned out. 
The process was a little challenging because for some reason kids never want to colour on demand. I kept trying to get Isla to draw a picture for Dad but she would just scribble something. Finally I thought of just having her cut out shapes to put on a circle to be a soccer ball - much easier to cut out then little thin lines and scribbles. 
After the picture was done I traced the image out onto the freezer paper and cut it out with an x-acto knife and ironed it on to the tee. Then I used white fabric paint and painted a few coats. I pulled off the stencil once it was dry and ironed the back of the shirt to set it. And voila, a new shirt for Dad.
And don't be fooled by the photo, he's not usually so serious :)

Wednesday, July 20, 2011

How to make a photo memory


For Father's Day I gave my husband 2 framed photos of our girls. I saw this great idea on Pinterest and thought it would be a fun thing to make and now I would love to make one every year and keep an album of them.

I took the photos into Photoshop and added the list of things the kids love right now. I played with different fonts and colours. Since my background is coloured it was changelling to get fonts and colours that showed up well on them. For the photo of Isla I traced out and highlighted the background above the grass and blurred it so the women back there is just a blur and not a real part of the photo.
I'm really happy with how they turned out, it helps that I have super cute kids :)

Saturday, June 04, 2011

How to make a rock family plaque

Here's what Lilo made for Father's Day last year.
I saw a similar idea but she personalized it by writing our names out. The plaque is from the dollar store, the rocks from the beach, googly eyes from my collection and embroidery thread for the hair. If it wasn't so last minute I could have painted the background first but all in all it's pretty cute.
We should get on to this year's gift, only a few weeks away.

Sunday, May 29, 2011

How to transfer your kids artwork to a t-shirt

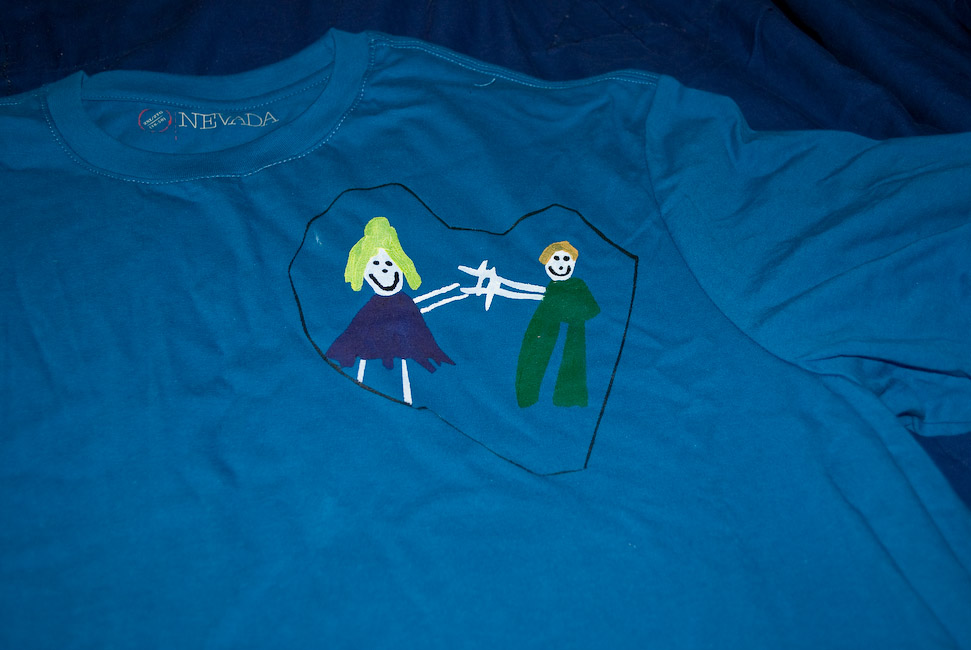
For my husband's birthday Lilo and I made him a shirt. I saw this idea to transfer your kids drawings on tees with freezer paper a while ago so I thought I'd finally try it out.
I first asked Lilo to draw a picture for the shirt. I asked to only use 1 or 2 colours but she couldn't so she restricted herself to 6. If your child's drawing is only 1-2 colours it would be easier. Anyways I went with it.
I traced out the picture onto Freezer paper. For those of you that don't know what this is it's butcher paper. It's not easy to find, I got mine at No Frills once over a year ago but haven't seen it since. It's with the plastic wrap, mine is Glad brand.
Anyways, the cool thing about this paper is that you can iron it on to fabric and it stays until put but can be pulled off so it works great as a stencil.

So back to the t-shirt, after tracing out the picture I cut it out with an x-acto knife, careful to keep the loose pieces.
Then iron the paper, including the little pieces such as around the arms. Since Lilo drew a heart around her and dad I cut a thin line around the shape so I could include on the shirt. Then I painted the shirt using the drawing as a guide for where to put the colour.


When the paint was dry I removed the freezer paper. Lilo was upset that she forgot to add her arms in the picture so I added them on after and I also added the face. Then to set the paint just iron the image on the back side.


I glued Lilo's drawing to the gift bag, she was pretty proud of the shirt. And I think it makes a cute bumming around the house shirt.

Afterwards I made another shirt with Lilo's drawing of a bike. I love how this turned out. It was a little tricky to cut all the little pieces out but I think its cute. I started by cutting out the main shape and ironed the outline on. The small pieces I cut out part by part and ironed on as I cut so I would loose the pieces. At least painting was much easier.

Monday, July 13, 2009

How to make something for Dad

Here are 2 gifts that Lilo made for her Dad. His birthday was the day after we got back from Florida so I didn't plan any gifts since we did a bunch of shopping while we were gone. The girls and I did make cupcakes and I thought that was good. But at 5pm - 20mins before my husband got home, Lilo says that we have to make something a present for Daddy. How could I say no. I was trying to think of something quick we could do and saw an easter egg on the floor of the play room and was reminded of a craft I saw on Mr. Maker - a wobbly clown.


First open the egg and put a piece of modeling clay or I used a piece of blue sticky tack since I had some on hand from university.


Then close it up and add a face. We put googly eyes on, pompoms for hair, a red jewel for a nose and made a mouth out of a foam sheet. Then Lilo said he needed ears - so we glued them on as well.

Daddy loved it. But the following week the episode of Mr. Maker was on where he made this clown and Lilo realized that we made it wrong. The nose should have been a small red pompom and the hair was crunched up tissue paper. I say go with what you have.

Then I poorly planned Father's Day and made another last minute gift - again Mr. Maker inspired. It's a friendly dragon box to hold your bits and piece (pens and stuff).

It's made from an old tea box, covered with scrap booking paper. The eyes, nose and tongue are made from foam sheets. Lilo drew them out and I helped her cut them out and glue them on. She saw the glitter and thought he needed some glitter - so that's why he has red glitter eye. I think she was right, he did need some glitter. She also wanted to give him a happy smile to make him a friendly dragon. The tongue is glued under the flap so when you open his mouth the tongue is hanging below.